Sunset Photography: How it Started, How it’s Going, and Where it’s Going!

Welcome to my final update on my photography journey this semester. However, my newfound hobby will not be ending here. I am going to continue to post to my photography Instagram account, so feel free to give me a follow if you would like to see more!

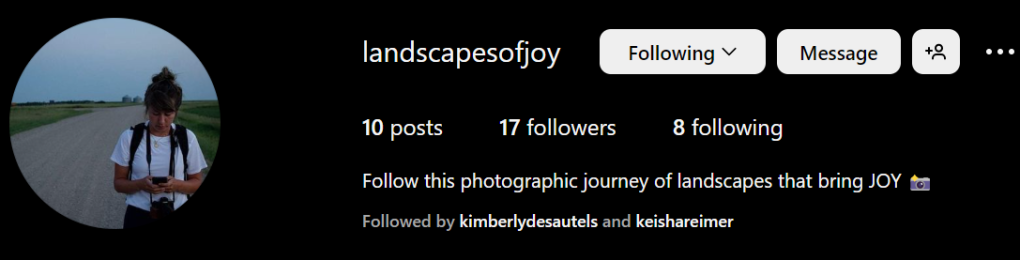
https://www.instagram.com/landscapesofjoy/

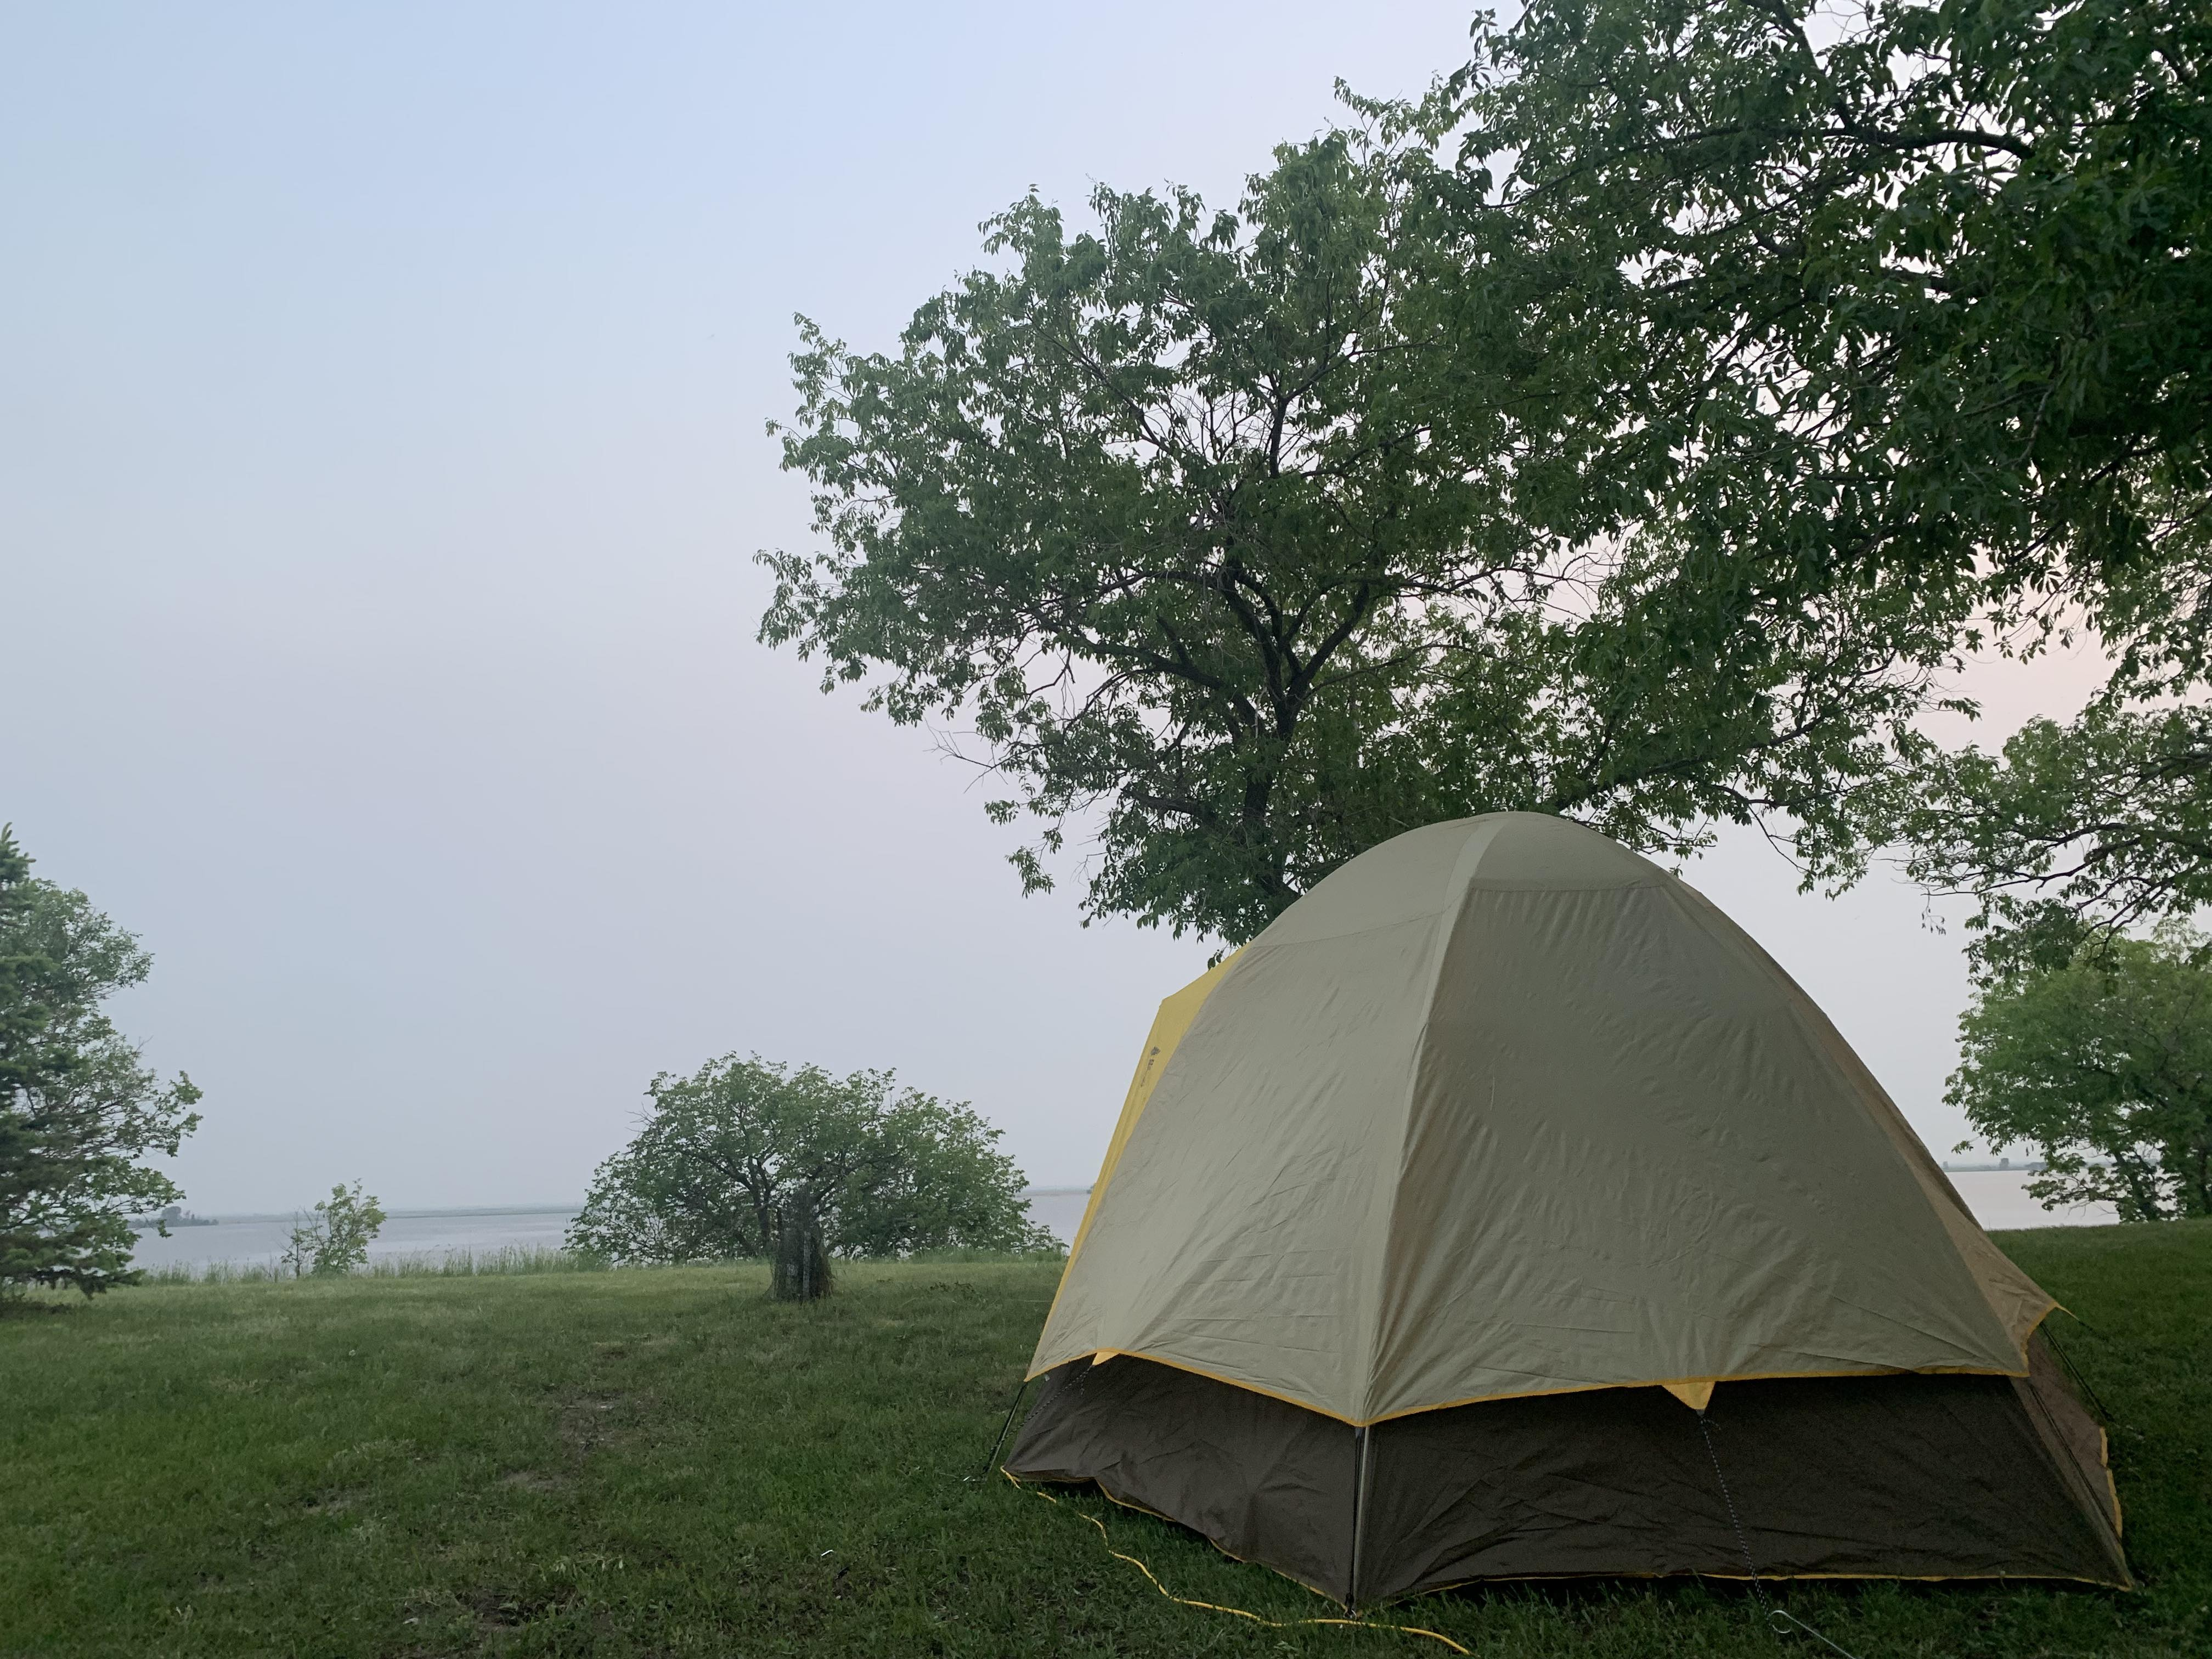
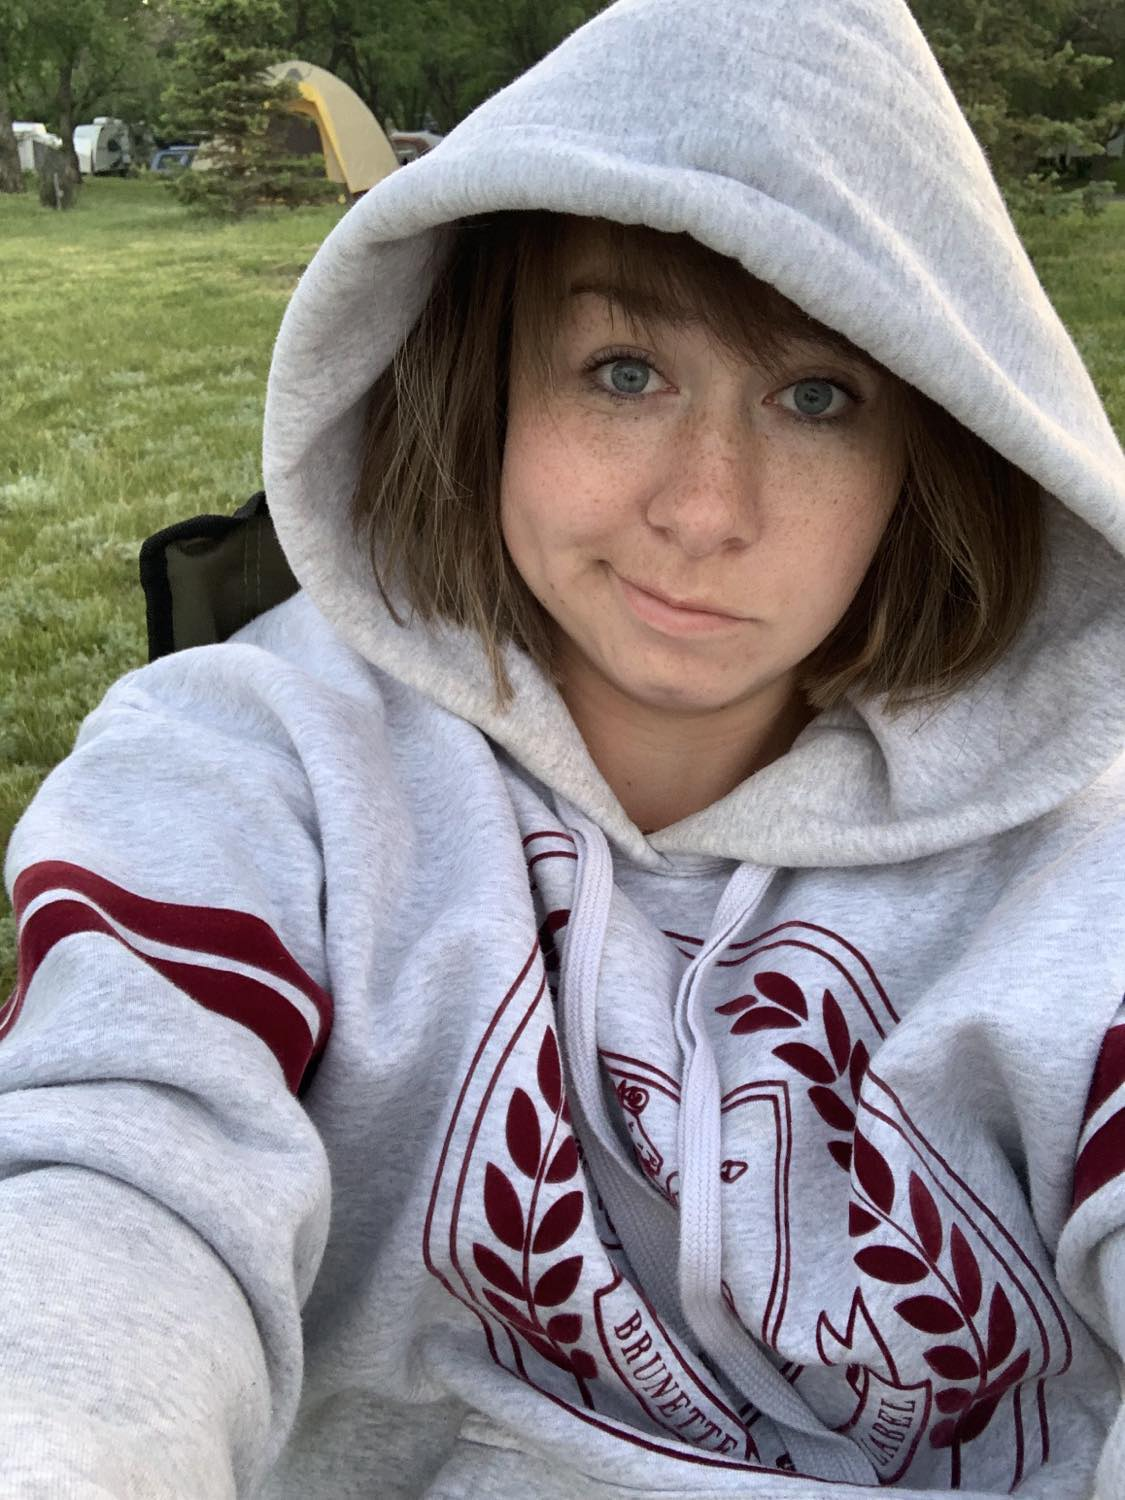
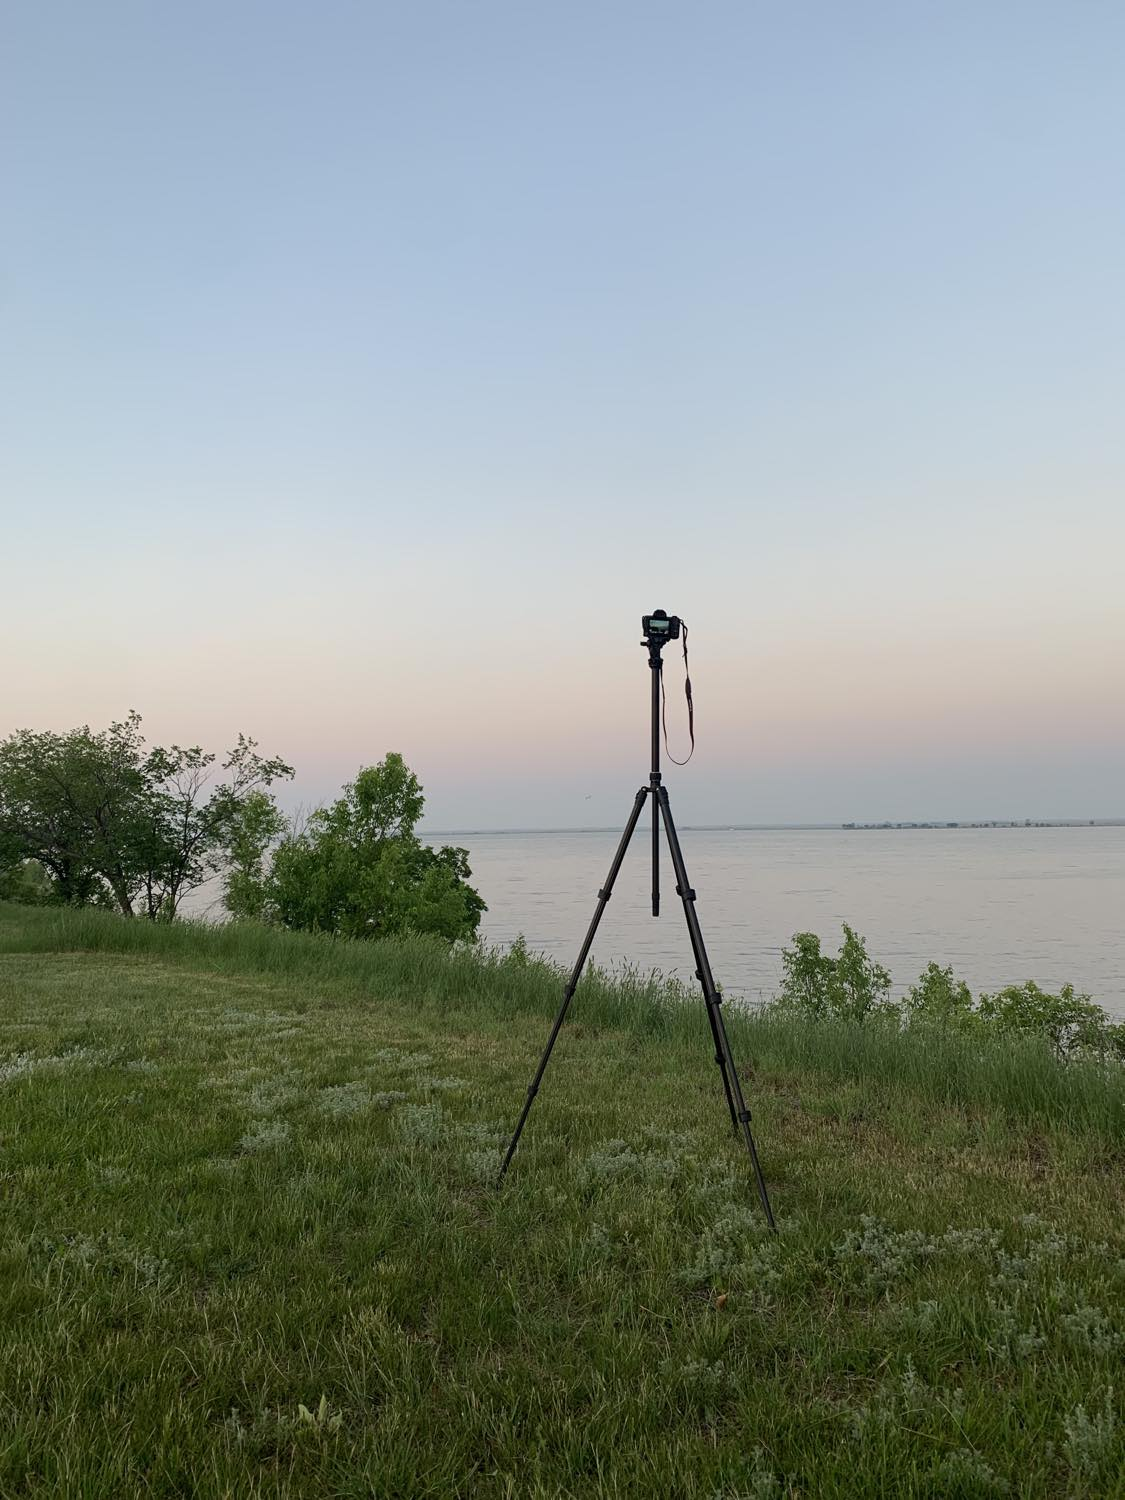
This learning project really challenged me in ways I was not expecting. I started out with the broad idea of taking landscape photos, to realizing I really only like sunset photos. This then proved to be very difficult to do, because sunset happens at a very specific time and happens quite quickly. I finally managed to talk my husband into videoing my ‘process’ (click the video below to get a snapshot).

Here is how it went for me most nights:

  1. FIRST I would sit on my couch in the evening, watching the sky from my window, checking the sunset time on my phone
  2. IF I saw the sky turning nice colors I would run to grab my gear, jump in my car, and drive as fast as legally possible to Douglas park hill
  3. THEN I would run up the hill (if the gates were locked, which was every time except for when we shot this video *luckily*), swatting a million mosquitoes
  4. AFTER finding the perfect spot I would begin to get my Manual setting set up just right to capture the photo (these settings were changed constantly as the light shifted throughout the sunset)
  5. FINALLY, after taking at least 30 photos, and the sun had set, I would drive home, sift through them all, and choose my favorites

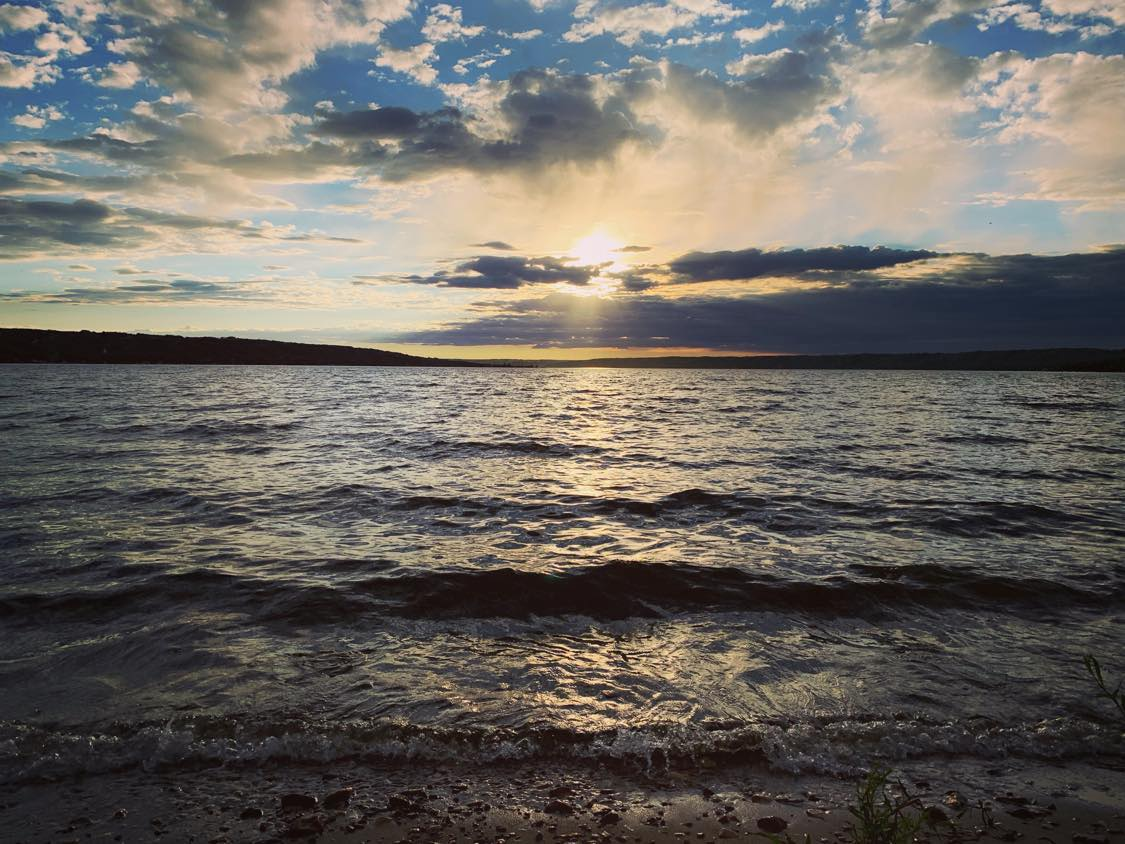
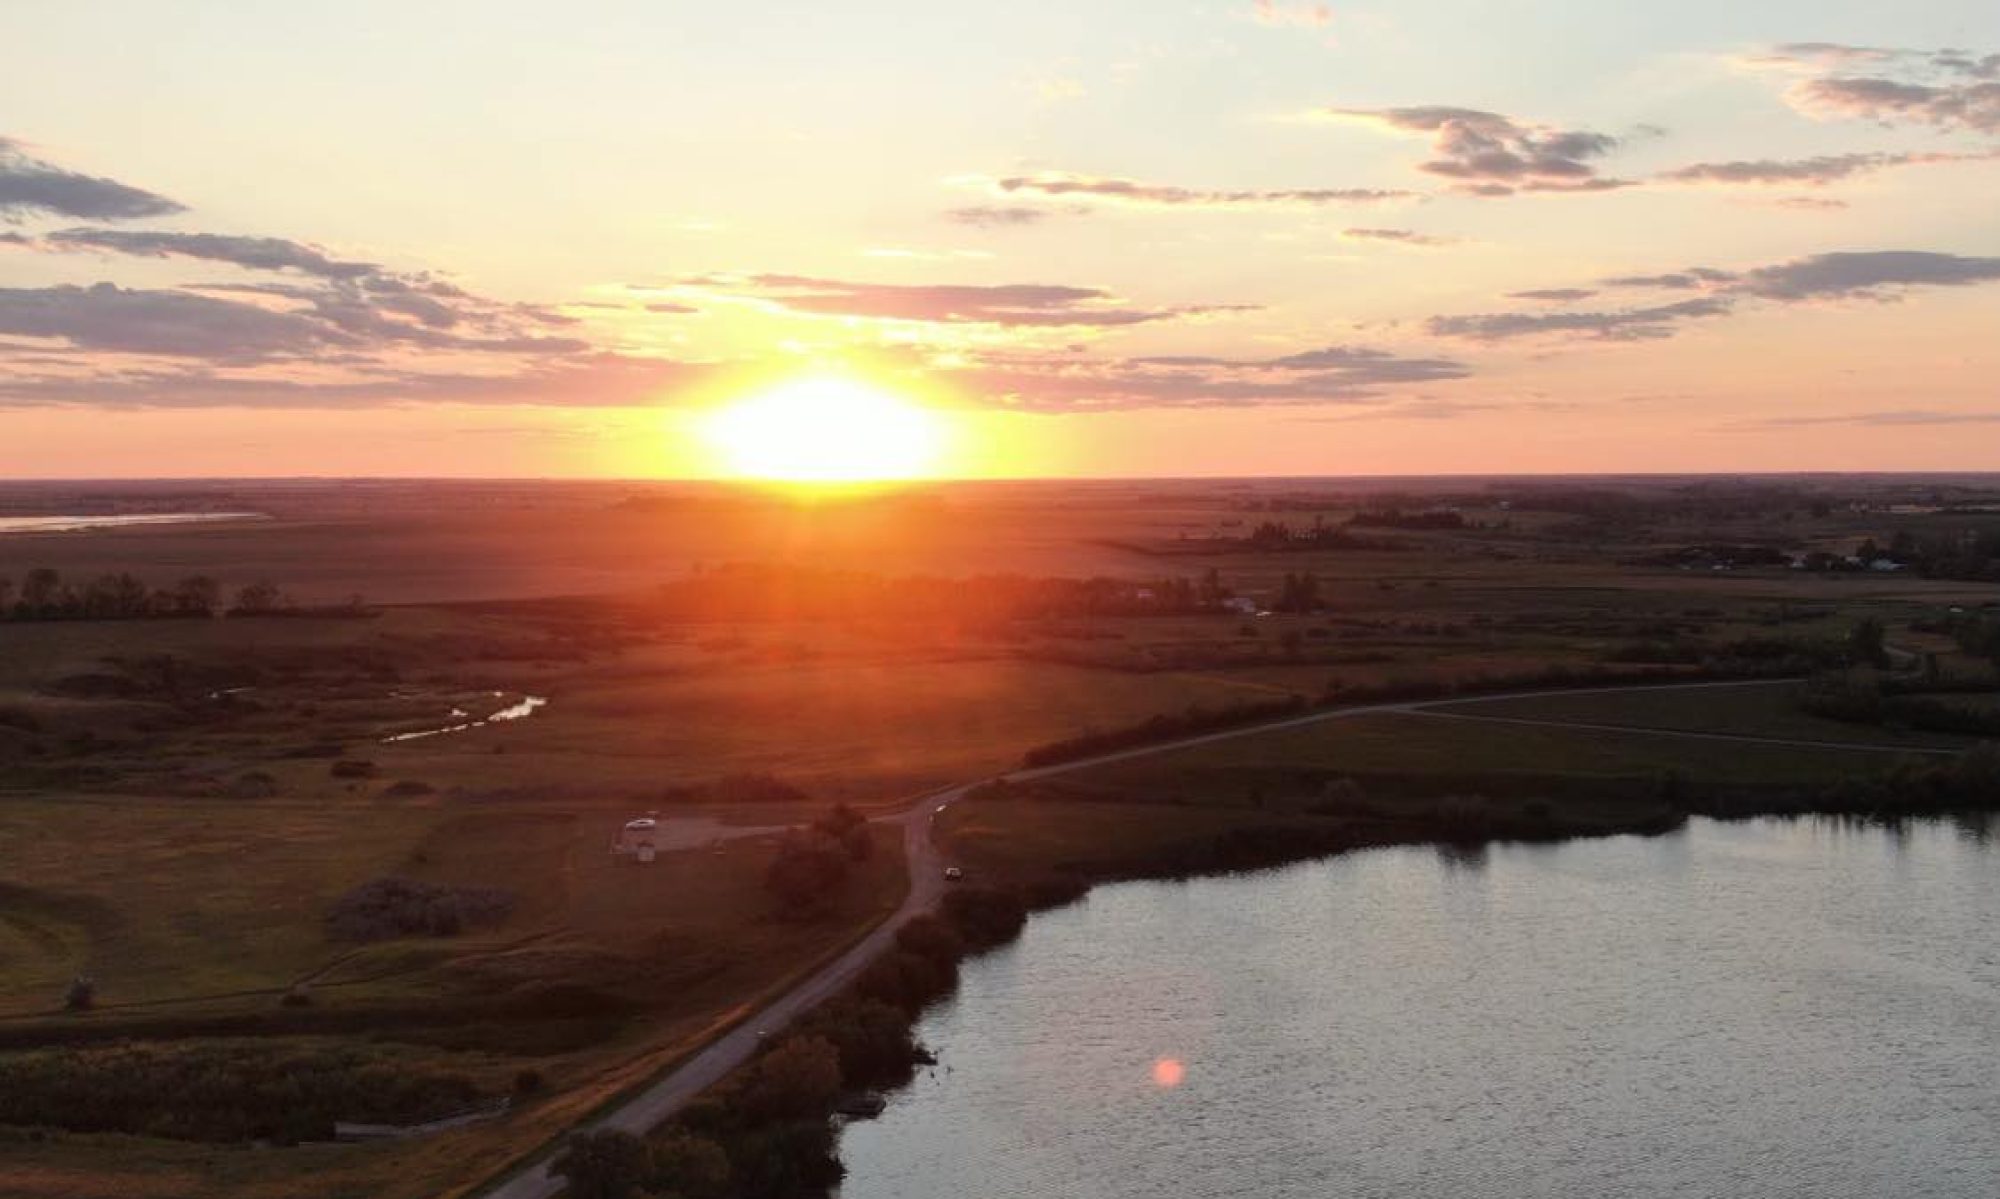
Needless to say, my husband HATED this part of my learning project. But now that I am in the habit of chasing the sunset, I hate to miss one. It really is one of the most beautiful, unexpected, parts of the day. Each night brings new colors, new obstacles, and new beams of light. Here is one of my favorite shots from my latest sunset chase.

Measuring my Progress

How it StartedHow it’s GoingWhere it’s Going
– Just a girl & a camera– Still a girl & a camera
– An Instagram Account to connect & create
– A Feedly Channel to find content
Twitter Photography Accounts
Pinterest Inspiration
Youtube Channels to follow
Photography Blogs and websites to learn from
– Girl & Camera
– Online content to consume
– Online space to create
– Share a photo to Creative Commons *slightly terrified to do this but also excited!*
– Take some in-person photography classes

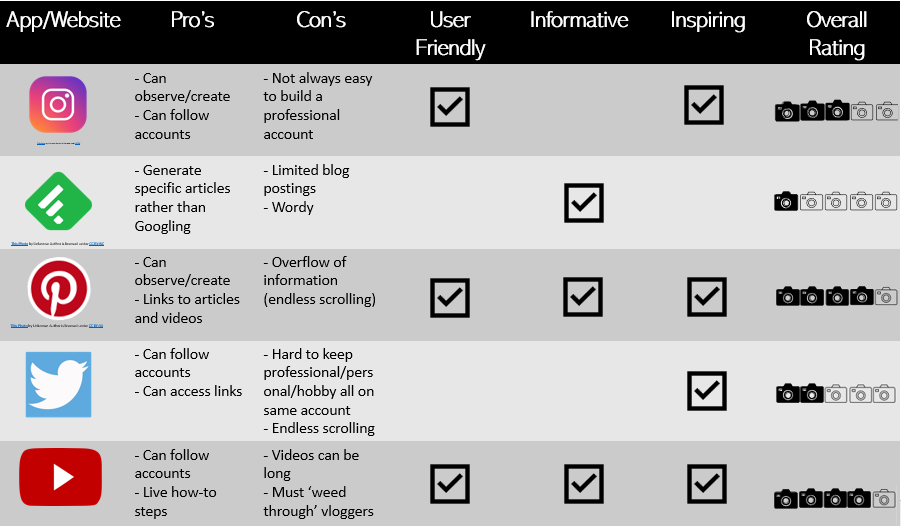
Learning Online: Pros/Cons

ProsCons
– Resources at my fingertips
– Influences from around the world
– Space to share and create with a wider audience
– Endless information for whatever you need
– Free
– Isolating
– Endless scrolling
– Tough to ‘weed’ out the good from the bad resources
– Increased personal screen-time

Overall, I found learning online to be very ‘user-friendly’. However, I sometimes struggled to get personalized information. I would be outside, taking photos, and realize that I needed an opinion on how to emphasize certain angles or light features. But I had no one to ask. So I would look it up on my phone or trial and error it. But it was hard to find specific-in-the-moment answers. I think to continue my journey I would love to take an in-person photography class to balance out my learning experience. I see the benefits of learning a new skill online, but I also think I learn best through a combination of online and in-person. I have learned so much in these last 7 weeks through online resources and I am so grateful that this project re-inspired me to try photography again. I can honestly say that this is a skill I will continue to build upon and learn about both online and hopefully in person!

In conclusion, if you would like to learn more about the specific digital tools I used along my journey, feel free to scroll through my other posts. And don’t forget to give me a follow if you would like to continue with me on my photography journey!

The Best Photography Platforms…and it’s not Google

Hey guys!

Thanks for all your support in reading my blog each week. This last week was tough for me to accomplish what I had planned to do. I was really looking forward to trying a long exposure at sunset and also videoing my process. Unfortunately, my husband (who I was going to ‘hire’ to film me while I walked you through the process) got called away for work this week, so I wasn’t able to simultaneously vlog and take photos. My second dilemma was that the weather was just not great. Between the rain and mosquitos, I wasn’t able to get a long exposure shot like I had planned. So I still took some photos, most of which are not nice enough to share, and I settled on one that was neither long exposure nor a vlog. However, my plan is to do a final wrap-up post of my project this week where I am able to deliver both of these things! **Fingers Crossed**

…if only it was a long exposure

With all the unpredictable weather this week, I spent a lot of time continuing to research photography tips and tricks. As I was researching I started to notice that there were certain platforms I preferred compared to others. Some were a lot more user-friendly, inspiring, and more informative than others. So for this week, I thought I would compile the various sites/apps I have used on my photography journey and review which ones I felt were helpful in my self-taught journey. (Ps. I borrowed the rating system from Laura Gaboury when I saw the way she rated her bread with dough balls! Loved that!)

Self-Teaching Apps/Websites for Photography

As you can probably see, I have found Pinterest, Youtube, and Instagram to be the most helpful in my photography journey. Although I have used all 5 to help with my photography, I have found those three the most useful. However, the nice thing about all 5 of these online spaces is they are a great springboard for finding other really neat resources and websites. I actually considered listing Google but I realized that I seem to prefer to start my searches on one of these sites OR Google eventually takes me to one of these sites. It’s interesting to think that Google was ALL the rage and now I rarely use it.

Do you find this as well with Google, or am I the only one?

Overall I have really enjoyed growing my photography learning network through these platforms. I think that the ability to save, share, or create allows these platforms to work better as a teaching tool for learning a skill online. Being able to participate on the platform or save things for later is a BIG plus!

I’m curious though, what platforms have YOU been accessing the most on your learning journey?

P.S. Not photographed…the mosquitos drinking all my blood while I took the photo below

I was not built to photograph sunrises…4am is too early

Welcome back! Last week I said I wanted to try some long exposure to add a layer of difficulty to capturing my perfect sunset photo. So I started by researching how to take long-exposure photos (click here to watch a screen recording of me walking through the links I used this week to inform my project).

I quickly learned that I had a skewed idea of what long exposure really was. I thought it was more of a time-lapse effect, where in reality it is tied to your shutter speed. I also reviewed and purchased a tripod (after learning that stability was essential for a long exposure shot). As I spent more time searching online I found out that it was also important for focus during a long exposure to not press the actual ‘photo button’ on the camera (sorry I can’t recall the technical name). So I then researched and download the Canon app that allowed me to control my camera from my phone (this was VERY helpful, I wish I had known about it sooner). As I continued to research my project for the week I found a lot of photographers chose to capture long exposures at sunrise (not my forte, but I figured why not, it has to be similar to sunset…I was wrong, very wrong). So with my camera, phone, and tripod, I figured I was all set to capture the perfect sunrise. One problem…sunrise happens at 4:48 am and all of the research was telling me I had to be out there an hour before that to properly set up.

So I decided to pack for a short camping trip, I figured that this way I could sleep at the spot I was going to take the picture. In my mind, I thought I would be able to wake up, set up everything, and then crawl back into my tent to take the photo from my phone (inside the warm tent). I thought I had it all figured out…

Our campsite the night before, facing the water and what I thought was where the sunrise would take place.

I arrived at the campsite and set up. I did a little more research to ensure I was completely prepared for my early morning. As I crawled into bed I made sure I had all my equipment right beside me and I set my alarm for 4:00 am. When the alarm went off I jumped out of bed and quickly grabbed all my belongings to start setting up. I got my tripod ready, I aimed my camera, and then I ran back to the tent to start adjusting the shutter speed as well as some of the other settings (I am still trying to only use the manual setting so that I get more confident with adjusting the controls). However, my tent was too far from where my tripod need to be so the connection from my phone did not work. So I sadly crawled out of the tent, found a lawn chair, and set up a spot just after 4:00am.

Me eagerly waiting for the sunrise shot… my tent in the background (where I wish I could have been)

As I waited for the first sign of the sun I began to get excited, I had very high hopes after reading so many blogs and watching so many videos of some amazing sunrise, long exposure shots. However… as I waited I started to notice colour forming out of the corner of my eye, to the left of me…not where I had set up camp, and nowhere near where I could easily access the sunrise…I had booked a campsite facing the WRONG direction… I couldn’t believe it, after all the research I did, I never thought to look up WHERE the sun would rise. With sunSET photography you just follow the sun and the colour, with sunRISE photography you have to be there before the sun, so you have to know where it is (obvious now, was not obvious then).

The moment when I realized I was going to miss my perfect long exposure sunrise photo.

Anyways, I decided to still make the most of the opportunity so I tested different shutter speeds and took multiple photos. I will share the one I finally decided was the best of the worst, but just know I was disappointed with it.

The moon was neat but the colors didn’t light up and the long exposure didn’t really show up in any observable way.

I guess this is why this assignment is called a learning project, if you don’t fail sometimes then you aren’t learning. I learned a lot from this week’s project, I think I was just more devastated because I got up at 4am and didn’t get the shot. Oh well, there is always next time. I think this week I will go back to sunsets (they just seem to be easier for me) and I will try a long exposure sunset (no more 4 am wake-ups). With this class nearing the end I may also try to use another camera to vlog my photography process so that I can demonstrate how I get my shots!

Thanks again for tuning in to this week’s update! Hopefully, I will have more of a success story for you next time!

…I did get a camping trip out of it so it wasn’t all bad! 🙂

P.S. Don’t forget to check out my Instagram where I have been posting other photos I have been taking as well!

So many buttons!!

The bottom parts that I highlighted in yellow are all the settings I can control when I am in MANUAL Mode.

So this last week I said I wanted to work on using the settings in manual mode more effectively. Manual mode allows you to control the image that is taken, it also requires more skill than using a preset setting (feel free to click on the link to learn more about what manual mode means…if you are interested). So in order to do this I sought out some new digital resources to learn about using each setting.

Shutter Speed (the setting on the far left that says 1/500)

This video (and website) were extremely helpful in breaking down the basics of shutter speed for me. I really enjoyed that I was first linked to the website and then I could scroll down to watch the video. I am realizing that I prefer video options for learning but that I also enjoy reading content as well. This resource was a winning combination for me! They also had articles on some of the other features I was exploring but I chose to seek out other resources to help broaden my resources.

Aperture Value ( The next setting that says F8.0)

For this setting, I found an online course through Panasonic that gives you mini-lessons on the basic functions of a camera. I was able to work through the course independently. I enjoyed this style of learning online as well because the lessons were short. Versus the shutter speed resources, where the article was quite lengthy. However, the Panasonic lessons did seem a little outdated with their images and website, but it got the trick done. I could see this resource being helpful in a high school photography class.

Exposure Level Indicator (The next setting 3…2…1)

For this setting, I had to look up a camera interface from the Canon website so that I knew what it was for! I then searched the term and came across a blog called The Lense Lounge. The page I read up on provided a lot of great visuals and common questions and answers. It also led me to the connected Twitter which will allowed me to continue to follow their content going forward. It seems that exposure level is one setting that a lot of people can miss!

Highlight Tone Priority (The last setting that says D+1000)

To learn about this setting I found the EOS (which is my camera type) magazine website. I was able to find a specific article on this camera setting. Although the article was helpful, and short, which made it an easy read. It didn’t have as many clear visuals or videos.

Summary of Resources

WebsitePhotography LifePanasonicThe Lense LoungeEOSmagazine
Pro’s– Youtube channel
– images
– writing
– visuals
-courses/lessons
– short & sweet
– Twitter Page
– Visuals
– Q & A
– short & sweet
– visuals
– camera-specific images
Con’s– lengthy – no videos
– outdated
– length
– no videos
– no videos
– a lot of academic language

Now that you have read through my resources, let’s look at some of the fun photos I was able to shoot this week after learning about the 4 different manual settings!

Wascana Lake
Condie Nature Refuge

I have decided to further narrow my photos from general landscapes to sunsets/sunrise. This definitely adds a layer of difficulty to when I can take photos (the sun sets VERY quickly ha) but I am just obsessed with the colours!

For next week my goal is to use the Photography Life resource and see if I can find more information on whether or not I can take a long exposure of a sunset. I will have to get a tripod and ensure my camera has the capability. So, until next time, thanks for following along! Again, feel free to follow my Instagram where I post more frequently!

Competing With My iPhone

Before I get into the last couple weeks of my Learning Project Journey, let’s play a little game called “Can you Spot the Difference?”

Here is a series of photos I took with different settings on my camera as well as one on my iPhone. See if you can spot which one was taken on my iPhone!

As you may have gathered from the title of my post, I am still having a really hard time adjusting the settings to make the photo look as high quality as an iPhone naturally can do. I have been watching Fulaan Creative on Youtube because he makes content specifically related to my camera type. I watched some introductory videos about my camera as well as some photography basics videos. I learnt that although the automatic settings are more user-friendly, the manual settings where you can adjust the aperture and shutter speed allow you to learn how to manipulate your camera better for specific settings. So the last few times I was outside I worked on adjusting the different settings to see which ones got me the closest to the representation of the landscape that I was photographing. However, this is a lot more finicky than I thought it would be. Therefore my goal for the next week is to find some more specific articles/videos that can teach me some tips and tricks about adjusting the manual settings…rather than me having to trial and error every setting.

The best of the 50 I probably took..still a long way to go!

Instagram

@landscapesofjoy

I also decided to create an Instagram to post about my journey and to connect with other photographers. I found a few really good hashtags (#canoneosm50, #landscapes, #sunsets, #canonphotography) that provide a lot of inspiration and some accounts to follow with photographers using the same camera and shooting the same style of content. I love being outside in nature, specifically at sunset, so I decided to call my account LandscapesOfJoy. This somewhat limits my content but I also think there are a lot of different skills to be learnt when you do portraits, night photography, or landscapes so I figured it was best to just chose one. Anyways…if you feel like you would enjoy following my journey on Instagram, head on over to landscapesofjoy and give me a follow! 🙂

Thanks again for checking out my update! Feel free to share any tips/tricks if you have ever dabbled in photography!

Out From Retirement…Once Again

(The Journey of a Girl and Her Camera)

I have always loved taking pictures. It started with my first Canon camera in high school, then I started using my iPhone, and finally, I caved in the darkness of a covid lockdown and bought my first ‘real’ camera. I spent over 8 hours (which to me felt like a long time) researching online which kind to buy and finally settled on a Canon EOS M50…I couldn’t tell you what that means. When I finally got the camera, I was so excited, I expected to open it up, turn it on, point, shoot, and voila…a perfect photo. Unfortunately, that was not the case. After taking it on multiple outings to try to teach myself how to use it, I gave up…my iPhone automatically was taking better photos than my camera. So, I retired my camera and decided I should take a photography course. I signed up for one and was really looking forward to learning how to use my camera, only to receive an email that the course had been canceled due to covid restrictions. So once again I retired my camera.

This last Fall I got married and we needed to find a way to record the ceremony, so I excitedly stated that I had the perfect camera to do it! I went and bought a tripod and we used it for the ceremony, only to later discover there was no way to get such a long video in such high quality onto my computer/phone. I tried multiple times only to once again give up and put my camera into storage.

…SO, when Katia mentioned that we could choose a learning project I immediately thought of my camera. For some reason, I never thought to look online to learn how to use my camera. For my project this semester, I want to learn how to use the multiple functions on my camera and how to download photos and videos so I can use them. I am hoping to use Youtube and follow specific photography pages on Instagram to learn more about my camera and to be inspired. I am also wondering if it may be a good idea to start a second Instagram account for my photography journey. With Instagram functioning as a digital photo platform it may be the best way to showcase my growth and to gain a specific audience of followers.

Please let me know what you think and feel free to link any photography websites/accounts/videos if you know of any!

I will hopefully share my Instagram account in my next post so that you can follow it if you’d like!